.png?width=357&height=85&name=tpiq-logo%20(375x85).png)
Easily import and process multiple client returns at once
Overview
The Bulk Upload feature lets you quickly upload multiple client 1040 PDF files in one step. Once uploaded, TaxPlanIQ will:
- Automatically extract key client data
- Redact sensitive personal information
- Create draft tax plans
- Suggest applicable tax strategies
Average processing time: Approximately 4–5 seconds per page. For example, a 20-page return will typically finish processing in about 2 minutes.
Step-by-Step Instructions
1. On the Dashboard
From your TaxPlanIQ dashboard, look for the blue Bulk Upload banner that says:
“To upload 1040 forms, click or drag & drop them here.”

2. Select Your 1040 PDFs
When the file browser opens (on Mac, Finder):
- Shift + Click to select a range of files
- Command + Click to select individual files
- Command + A to select all files in a folder

3. Upload the Files
You can either:
- Drag the selected files into the blue upload box on your dashboard
- Or click Open in your file browser

Your clients will appear under the Draft Clients tab with a status of Processing.
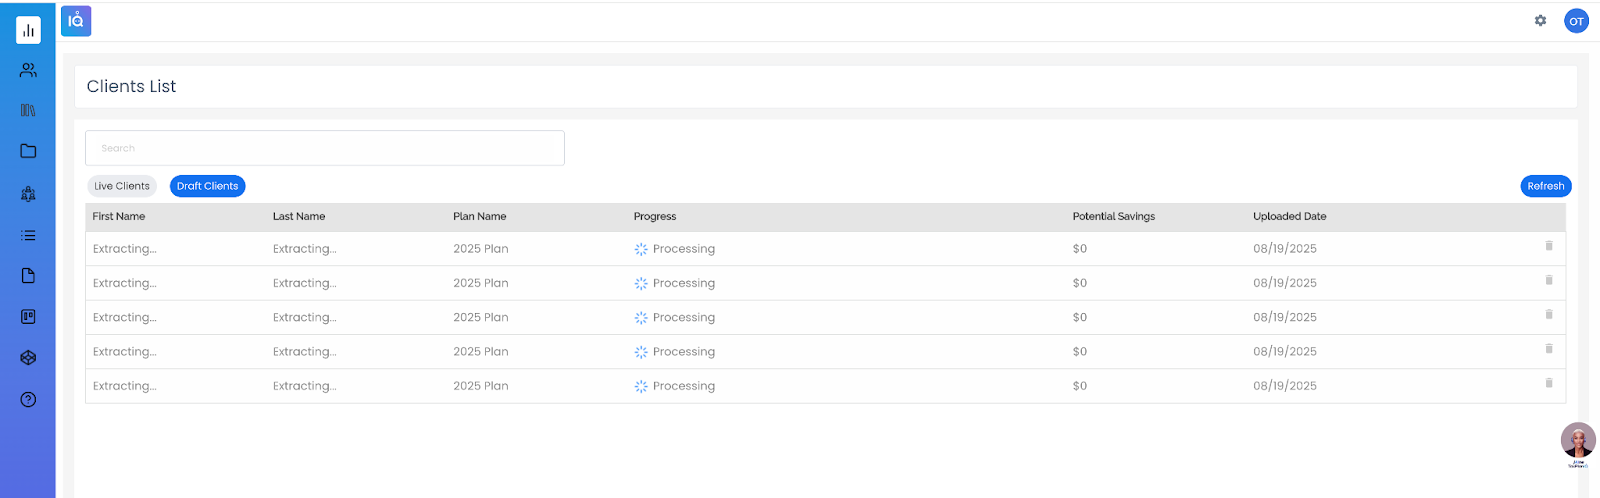
4. Monitor Progress
- Draft Clients are sorted by upload date by default
- The status will update automatically every 40 seconds: Processing → Client Details → Create Plan
- If there’s an issue (e.g., watermarks, redacted documents), you’ll see an error message
Tip: Remove watermarks or redactions and re-upload
5. Review Client Details
TaxPlanIQ will automatically pull the client’s name and filing details from the PDF.
- Click on a Create Plan to open the Create Details screen
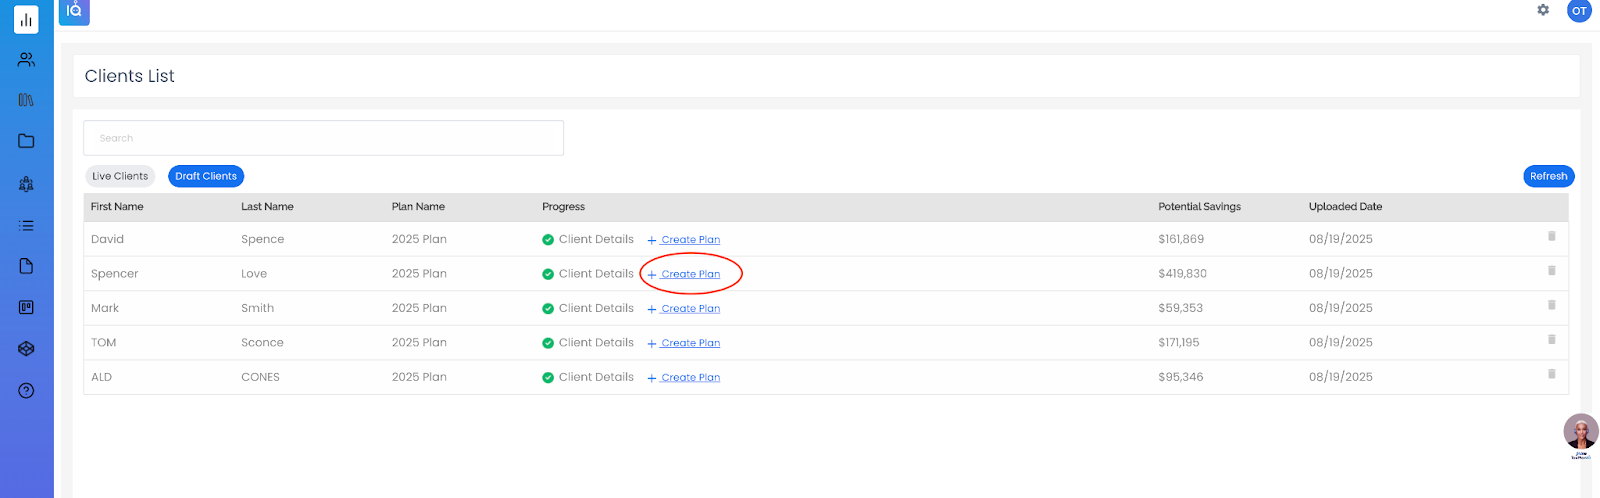
- Confirm or update:
- First & Last Name
- Filing Status
- Related Parties
- First & Last Name
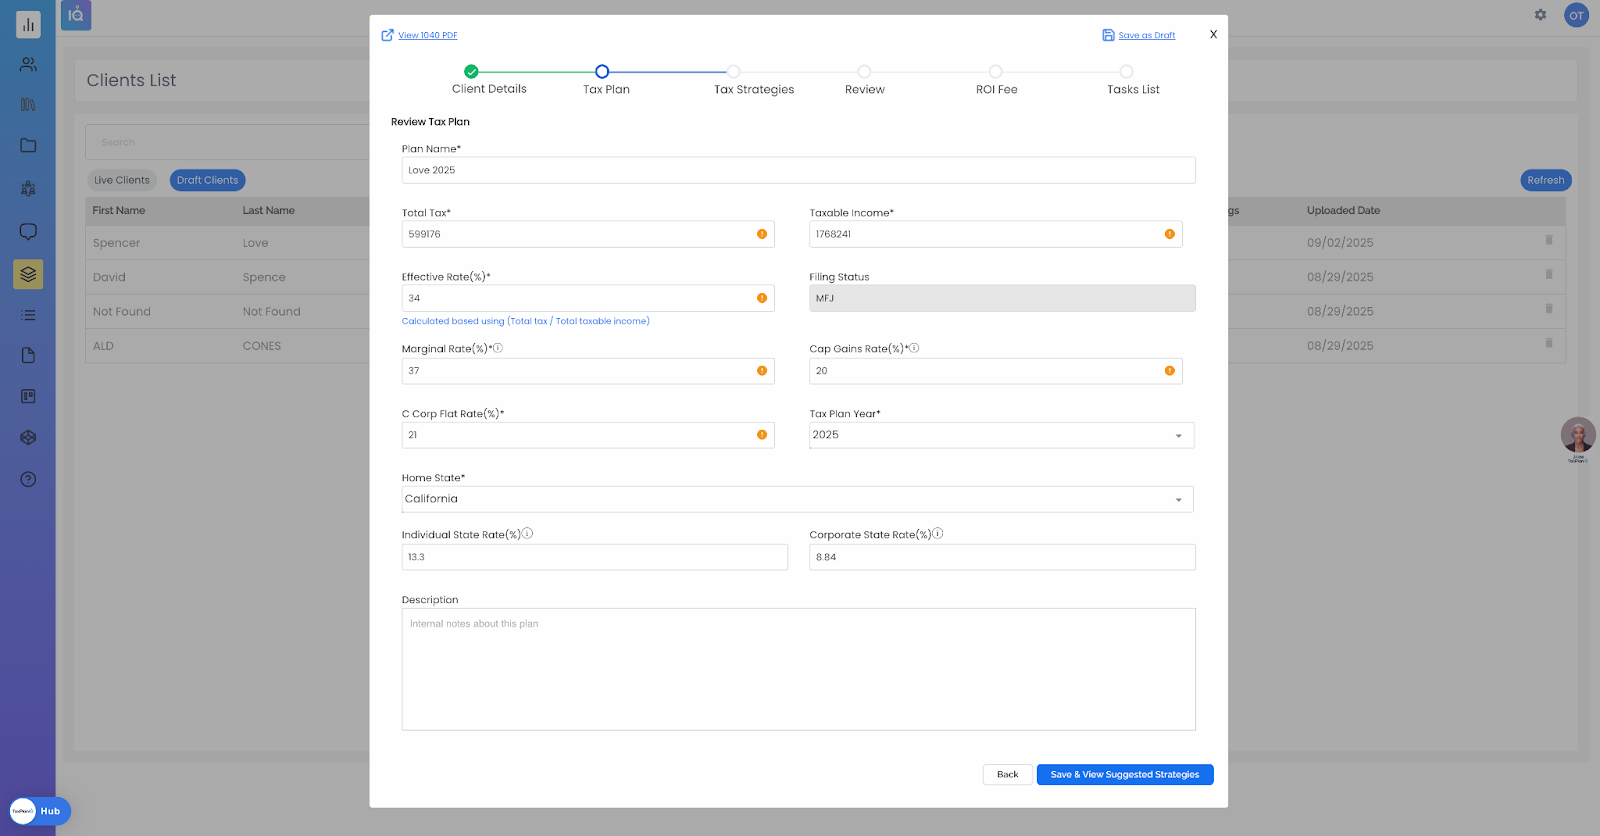
6. Finalize Plan & View Strategies
- Click the Save & View Suggested Strategies button
- Choose from two types of strategies:
- AI Suggested Strategies: Automatically selected based on the scan of the client’s Form 1040. We automatically suggest about 50 (See Appendix A)!
- All Strategies: Additional strategies that you can manually select for your client. There are approximately 130 total.
- Drag and drop your chosen strategies into the “Selected Tax Strategies” area to add them to the tax plan, or use the arrows.

7. Review and Add Strategies
- Click the Add Strategies and Review button.
- Enter or verify all the relevant information for each selected strategy. Amounts are pulled from the prior year return, if applicable, but you may have current year tax info from the client to change the plan amount.
- Once the information is entered for a strategy, check the Review and Add to Plan box on the top right.
- Continue with the process until all information is entered for each selected strategy.

8. Finalize the Plan
- Once all of the strategies have the necessary information added, you will then click the Add Reviewed Strategies to the Plan button to finalize the inclusion of all chosen strategies into the client’s tax plan.

9. Setting Fees Using the ROI Fee Tab
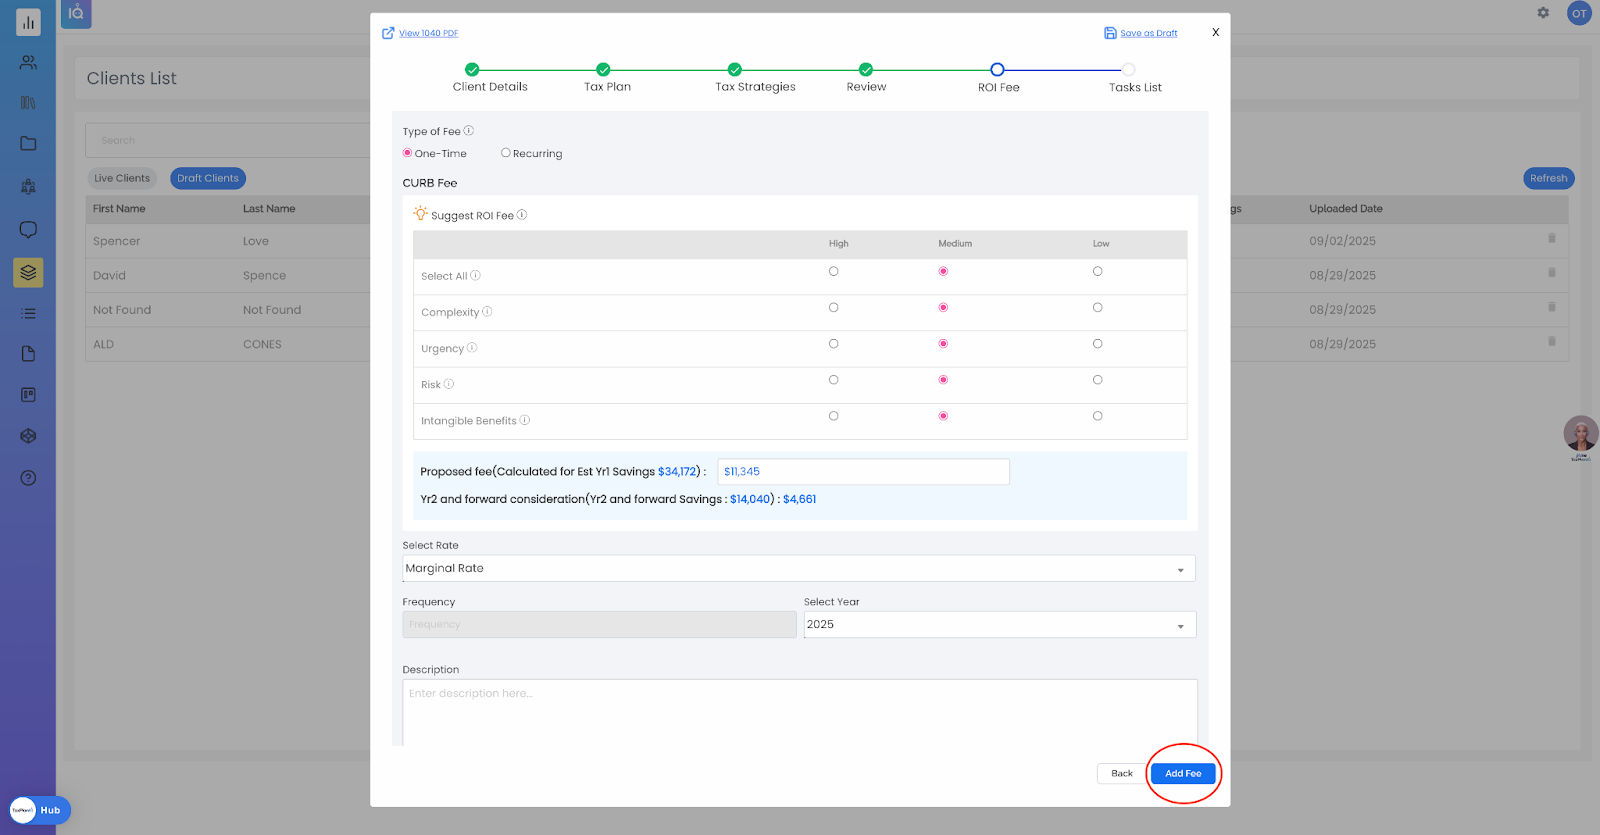
After reviewing your tax strategies and confirming the plan, the next step in the RAP flow is to set your fee using the ROI Fee tab, designed specifically to align with the ROI Pricing Method. This method offers a standardized, value-based approach to pricing tax planning services while remaining compliant with AICPA guidelines.
On the ROI Fee tab, you will:
- Select Type of Fee: Choose whether the fee will be a One-Time or Recurring charge.
- Use the ROI Fee Calculator: Click the lightbulb icon to activate the ROI-based Suggested Fee tool. This calculator uses four key factors—Complexity, Urgency, Risk, and Intangible Benefits—to determine a fair and consistent fee based on the value of the plan, not a percentage of tax savings. Each factor is scored as Low, Medium, or High, and the system uses a weighted average to calculate a proposed fee.
- View Estimated ROI: The tool will automatically display the Proposed Fee, calculated based on Estimated Year 1 Savings and forward savings projections. These values ensure transparency in pricing and demonstrate a clear return on investment for the client.
- Adjust if Needed: You can manually override the suggested amount if needed, though it’s recommended to use the calculated fee as a guideline to ensure consistency and compliance.
- Select Rate and Confirm: If prior fees have been paid or need to be factored in, enter them under Prior Fee’s Paid. Then, use the Select Rate dropdown (e.g., Marginal Rate) to define how savings are treated in the ROI summary.
- Finalize: Click Add Fee to save your settings and move on to the final task list.
The ROI Fee tab replaces arbitrary fee setting with a values-driven framework that reflects the true effort, risk, and benefit of the tax planning services provided. This structured approach not only helps you communicate your value more effectively to clients but also ensures pricing consistency across your firm.
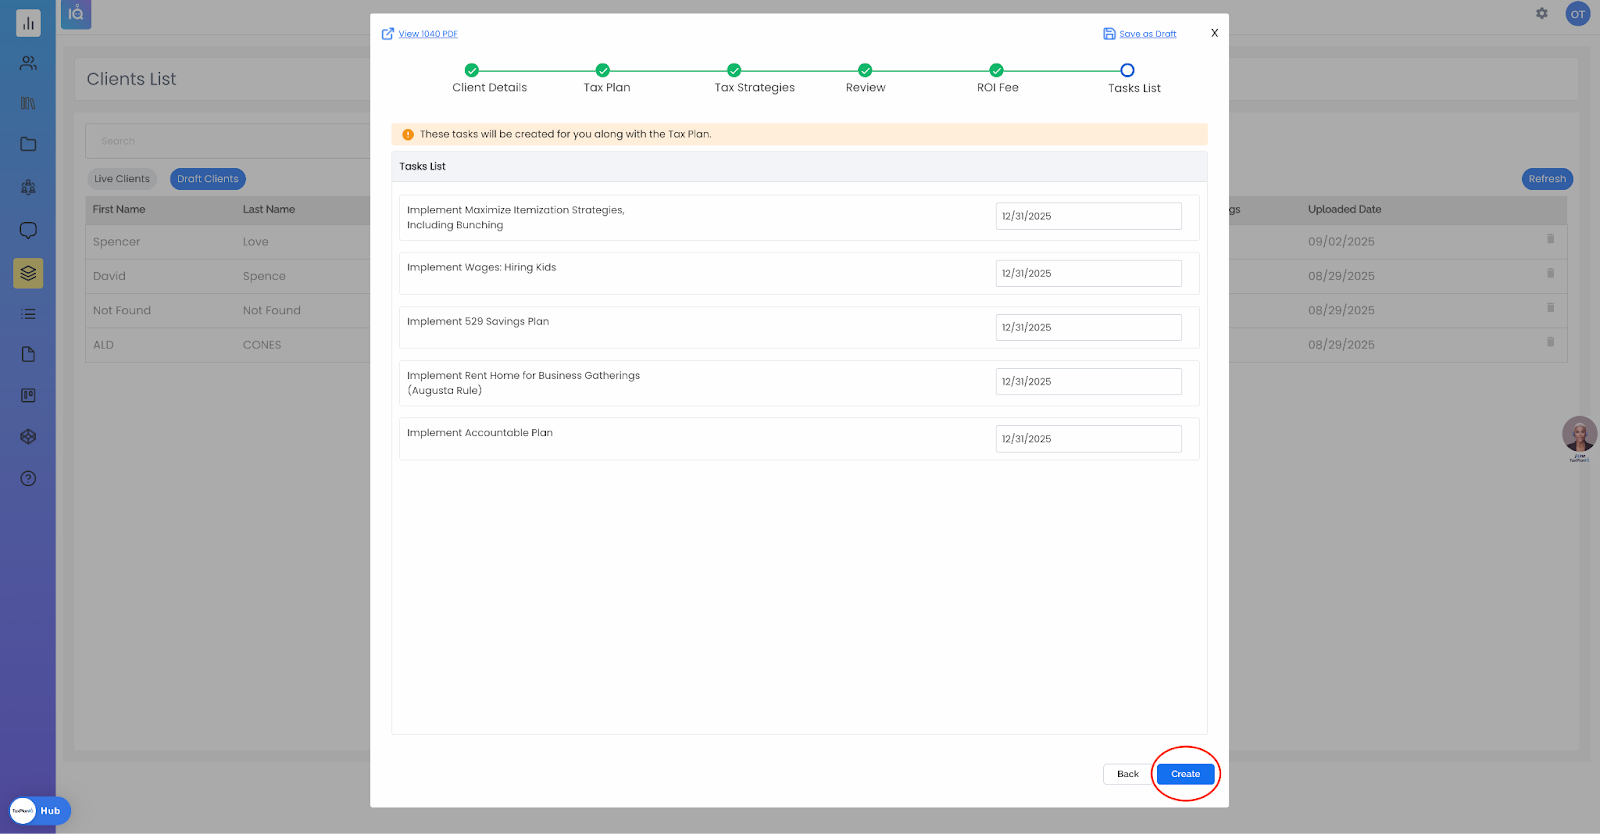
- Adding Tasks to Your Plan
- The final step in creating your tax plan involves scheduling the tasks that will help you achieve your tax goals. When you reach this section, the software will automatically suggest dates for each task, based on your inputs on the prior screen, aligning them with your overall goal completion date. You can review these dates and adjust them if necessary on this screen. After setting your task dates, just click the blue "Create" button to finalize your plan. You'll then be able to view and manage your newly created tax plan immediately.
Sorting & Workspace Cleanup
- By default, Draft Clients are sorted by upload date
- Click Potential Savings to sort by highest-value opportunities first
- Keep your workspace organized by:
- Moving completed plans to Live Clients
- Deleting failed or duplicate uploads
- Moving completed plans to Live Clients
Pro Tips
- Upload in smaller batches (10–15 returns) to keep processing times short
- While files are processing, explore other TaxPlanIQ features to maximize efficiency
Frequently Asked Questions
Q: What if a 1040 PDF is too large or has a watermark?
A: You’ll see an error in the “Progress” column. Remove watermarks or reduce file size, then re-upload.
Q: How is “Potential Savings” calculated?
A: It’s the combined Federal and State savings from all strategies suggested by the system.
A: Yes — open the draft, go to Client Details or Tax Plan, and make your changes.